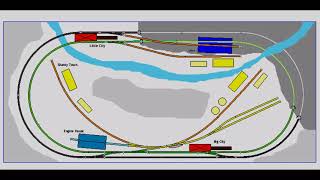
This video is the first in a series discussing my planning process for designing the track plan for a small, 36″ x 80″, N-Scale layout. (Correrction: in the video I talk about making a 30″ x 80″ layout. Later I decided to make it larger into a 36″ x 80″ layout in order to get it big enough to include everything I wanted.)
The series is aimed at a beginner model railroader, but there are a lot of hints for those with more experience. In this session, I will discuss how I used the Atlas Track Planning software (free) to plan the layout.
I have finished much of my previous layout, the Scenic Ridge RR built with a kit from Woodland Scenics.
Here is an outline of my video series on the Scenic Ridge (subject to change as I go along)
1. Introduction to Layout and Base Construction />2. Track Laying and Wiring Q
3. Switches (Turnouts) and Switch (Turnout) Motors
–Capacitive Discharge Switch Machine Power Supply
4. Outer Walls and Fascia Boards o
–Strong, Lightweight Table
5. Bridges and Tunnels
6. Mountain and Terrain Supports, Plaster Cloth, and Rocks Y
7. Roads and Buildings
8.Scenic Ridge #8 Final Scenery, Ballast, Tunnel Portals, Landscape, and Rocks k

